
A custom water cooling loop is one of the best ways to achieve superior cooling performance, lower temperatures, and a visually stunning PC setup. Unlike air cooling or all-in-one (AIO) liquid coolers, a custom loop offers better heat dissipation, quieter operation, and customizable aesthetics. However, setting up a custom loop requires careful planning, the right components, and proper installation to avoid leaks and ensure long-term stability. This guide will walk you through everything you need to know about building a custom water cooling system for your PC.
1. Why Choose Custom Water Cooling?
Custom loops offer several benefits over traditional air and AIO coolers:
- Better Cooling Performance: Custom loops dissipate heat more efficiently, keeping CPU and GPU temperatures lower.
- Quieter Operation: Water cooling reduces the need for high-speed fans, making your PC quieter.
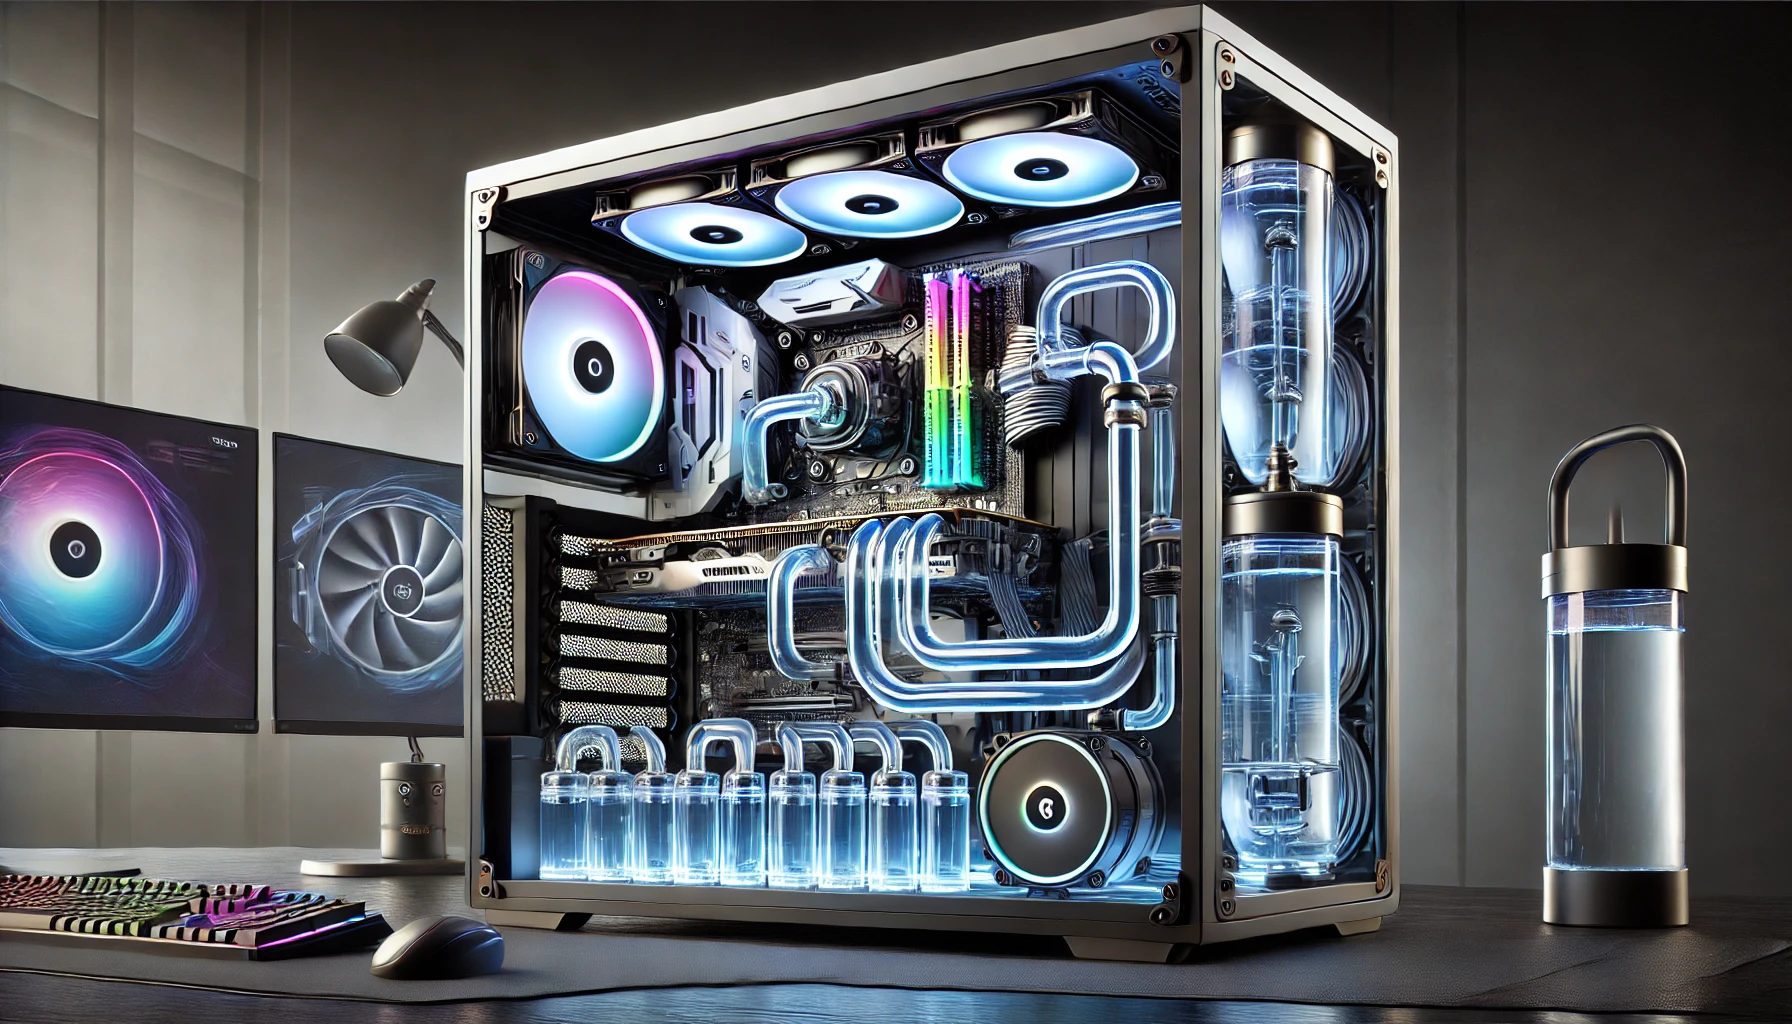
- Enhanced Aesthetics: Clear tubing, colored coolant, and RGB lighting add a premium look to your build.
- Overclocking Potential: Lower temperatures allow for higher and more stable overclocks.
✅ Tip: If you’re not overclocking or don’t need extreme cooling, an AIO liquid cooler may be a simpler alternative.
2. Choosing the Right Components for Your Custom Loop
A water cooling loop consists of several essential parts. Choosing high-quality components ensures reliability and performance.
Essential Water Cooling Components
- Radiator(s): Cools the liquid as heat is transferred away from the CPU/GPU.
- 120mm / 240mm / 360mm: The larger the radiator, the better the cooling.
- Thicker radiators provide more surface area for heat dissipation.
- Water Blocks: Attach to the CPU and GPU to transfer heat into the liquid.
- CPU Block: Designed specifically for your processor.
- GPU Block: Custom-made for specific graphics card models.
- Pump: Moves the coolant through the system.
- D5 and DDC pumps are the most reliable options.
- Reservoir: Holds the coolant and helps remove air bubbles.
- Often combined with a pump for a pump-reservoir combo.
- Tubing: Connects all components, allowing coolant to flow.
- Soft Tubing: Easier to install, more flexible.
- Hard Tubing (Acrylic/PETG): Requires heat bending but offers a cleaner look.
- Fittings & Compression Clamps: Secure the tubing to prevent leaks.
- Coolant: Transfers heat and adds visual appeal.
- Clear or colored coolant available; some include anti-corrosion additives.
✅ Tip: Plan your loop order before buying components to ensure everything fits inside your case.
3. Planning Your Custom Loop Layout
Careful planning is essential to avoid compatibility issues, clearance problems, and inefficient cooling.
Loop Order (Flow Direction)
While water cooling loops do not require a strict order, a common and effective setup is:
- Pump/Reservoir → CPU Block → GPU Block → Radiator → Back to Pump/Reservoir
Radiator Placement
- Top Mount: Good for exhausting heat out of the case.
- Front Mount: Brings cool air in but may raise internal temperatures.
- Bottom Mount: Less common, used for additional cooling.
✅ Tip: Always position the reservoir above the pump so coolant flows into it naturally, preventing dry pump operation.
4. Installing the Custom Water Cooling Loop
Once you have all the components, follow these steps for installation.
Step 1: Prepare the Case
- Remove old cooling components (air coolers, AIOs).
- Install the radiators first to ensure they fit properly.
- Mount the pump/reservoir in a stable position.
Step 2: Install the Water Blocks
- CPU Block:
- Apply thermal paste before mounting the block onto the CPU.
- Tighten screws evenly to ensure proper contact.
- GPU Block:
- Remove the stock cooler carefully.
- Apply thermal pads and paste to the GPU die before mounting the block.
Step 3: Cut and Install Tubing
- For Soft Tubing:
- Measure and cut tubes to the correct length.
- Insert tubing into fittings and secure with compression clamps.
- For Hard Tubing:
- Heat the tubing to bend it into the desired shape.
- Use silicone inserts while bending to prevent collapsing.
✅ Tip: Test-fit all tubes before filling the loop to ensure proper alignment.
Step 4: Secure Fittings and Check Connections
- Ensure all fittings are tightened properly to prevent leaks.
- Use 90-degree and angled fittings to make complex bends easier.
Step 5: Filling the Loop and Leak Testing
- Perform a Dry Run:
- Use a paper towel test around fittings to detect leaks before adding coolant.
- Fill the Reservoir:
- Slowly pour coolant into the reservoir.
- Tilt the case slightly to remove trapped air bubbles.
- Power the Pump Only (No PC Components):
- Use a 24-pin PSU jumper to turn on the power supply without booting the PC.
- Let the pump run for at least 30 minutes to an hour to ensure no leaks.
✅ Tip: If you notice bubbles, gently tap the tubing or run the pump at different speeds to help air escape.
5. Maintaining Your Custom Water Cooling Loop
Proper maintenance ensures your custom loop remains clean and efficient.
Cleaning the Loop
- Every 6–12 months, drain the system and flush it with distilled water.
- If using colored coolant, clean the loop more frequently to prevent dye buildup.
Checking for Leaks and Performance Drops
- Regularly inspect fittings and tubing for any signs of leaks.
- Monitor coolant levels—if they drop unexpectedly, check for small leaks or evaporation.
Replacing Coolant
- Clear coolants last longer than opaque or pastel coolants, which may require more frequent changes.
- Always use coolants with anti-corrosion and anti-bacterial additives to prevent buildup.
✅ Tip: If your system becomes noisy, it may have trapped air—tilt the case slightly and cycle the pump to remove it.
6. Common Issues and How to Fix Them
Pump Not Working
- Ensure the pump is connected to the correct power header.
- Try a different power cable or SATA connector.
High Temperatures After Installation
- Check if thermal paste was applied properly on the CPU and GPU.
- Ensure the pump is running at the correct speed.
- Verify the radiator fans are spinning in the right direction.
Coolant Flow Issues
- If flow is weak, check for kinks in the tubing or blockages in the radiator.
- Make sure the reservoir is filled properly.
✅ Tip: If you experience flow restriction, try repositioning your radiators or pump.
Final Thoughts
Setting up a custom water cooling loop requires patience and planning, but the results are superior cooling, a quieter system, and an aesthetically stunning PC. By choosing the right components, properly installing tubing, and maintaining the system, you can keep your PC running at optimal temperatures while enjoying the benefits of custom water cooling.